You’ve chosen your Squarespace template, but now you want it to look like your brand. The easiest place to start is with your fonts and colours.
In this tutorial, we’ll change your site’s main styles first, then show you how to make individual sections look different when you need to.
Note: This tutorial covers Squarespace version 7.1. If you’re not sure which version your site is on, go to Website → Pages and scroll to the bottom of the panel. You’ll see whether your site is running Version 7.0 or Version 7.1.
Open the Site Styles
In your Squarespace dashboard, go to:
Website → Styles or find the Brush icon in the top-right corner
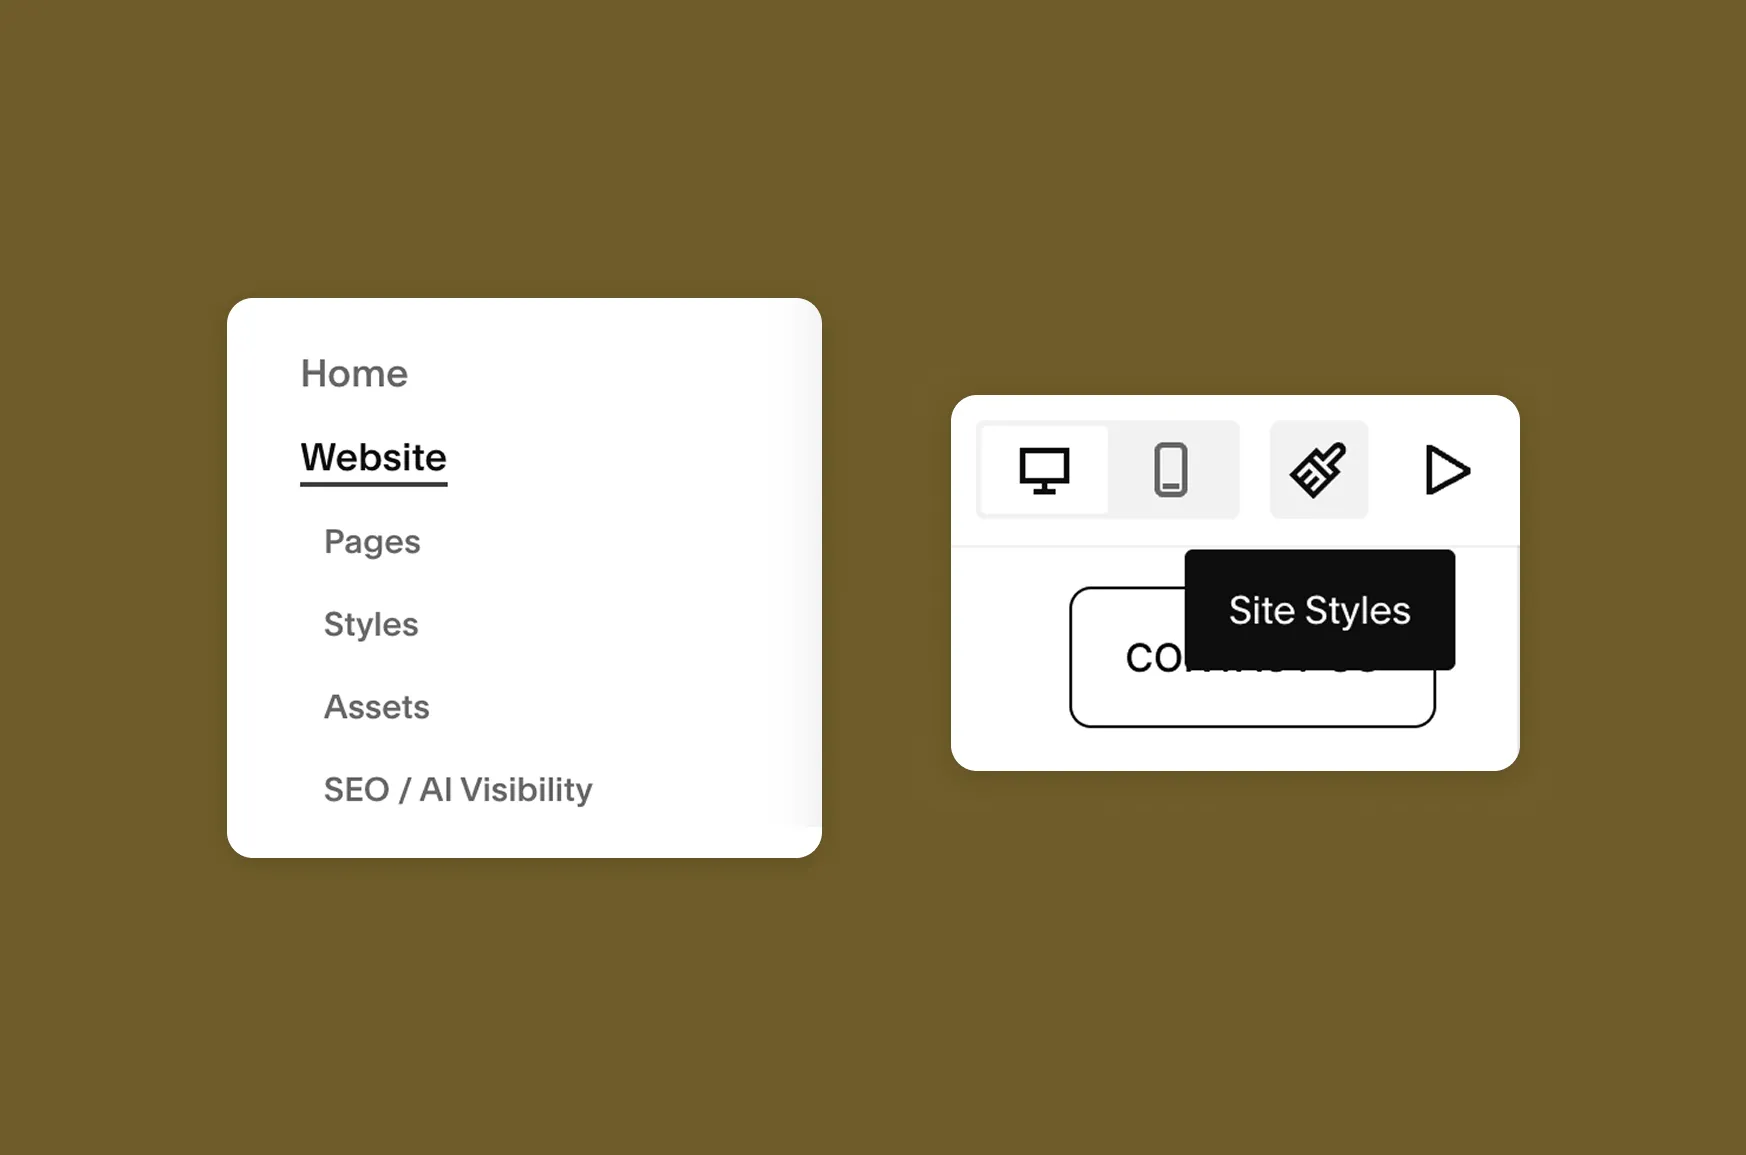
This is where you control the main visual styles across your website. Start here rather than changing individual pages or sections one by one.
Think of these as your site’s default styles. Once you set them, Squarespace applies them throughout your site.
Change your fonts
Open Website → Styles
You have two main ways to choose your fonts.
1. Use a font pack
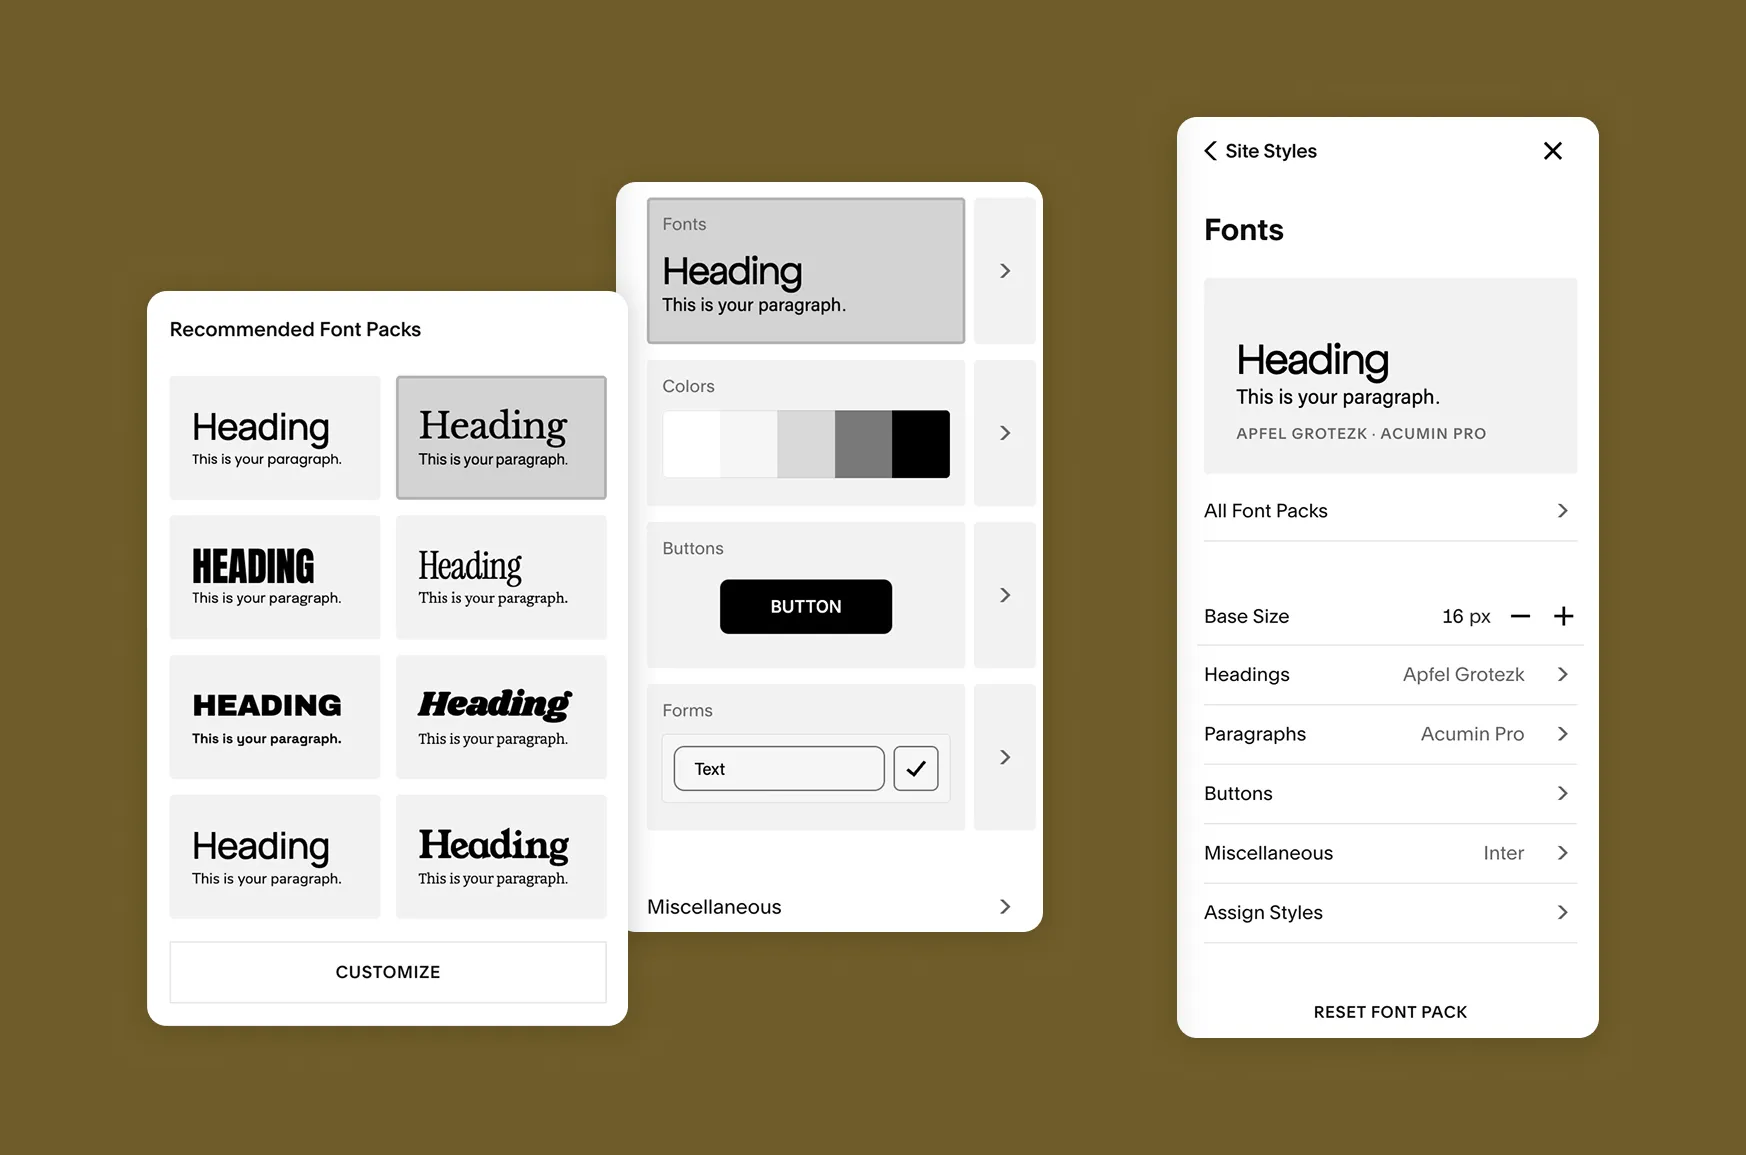
Click Fonts to check Squarespace’s Recommended Font Packs, organized into Sans-serif, Serif, and Mixed options.
Each pack gives you a coordinated combination of fonts for headings and body text, making it an easy option if you’re not sure which fonts work well together.
2. Choose your fonts individually
If you already have brand fonts in mind, click > next to Fonts.
From there, you can choose fonts for specific text groups, such as:
- Headings
- Paragraphs
- Buttons
- Miscellaneous
You can also adjust the Base Size and settings such as weight and spacing.
For beginners: Start with your heading and body fonts. You don’t need to customize every text style unless there’s a reason to.
Not sure which fonts to choose?
Take a look at our 6 font pairing tips for a standout Squarespace website.
Change your colours
Next, go to Website → Styles → Colors.
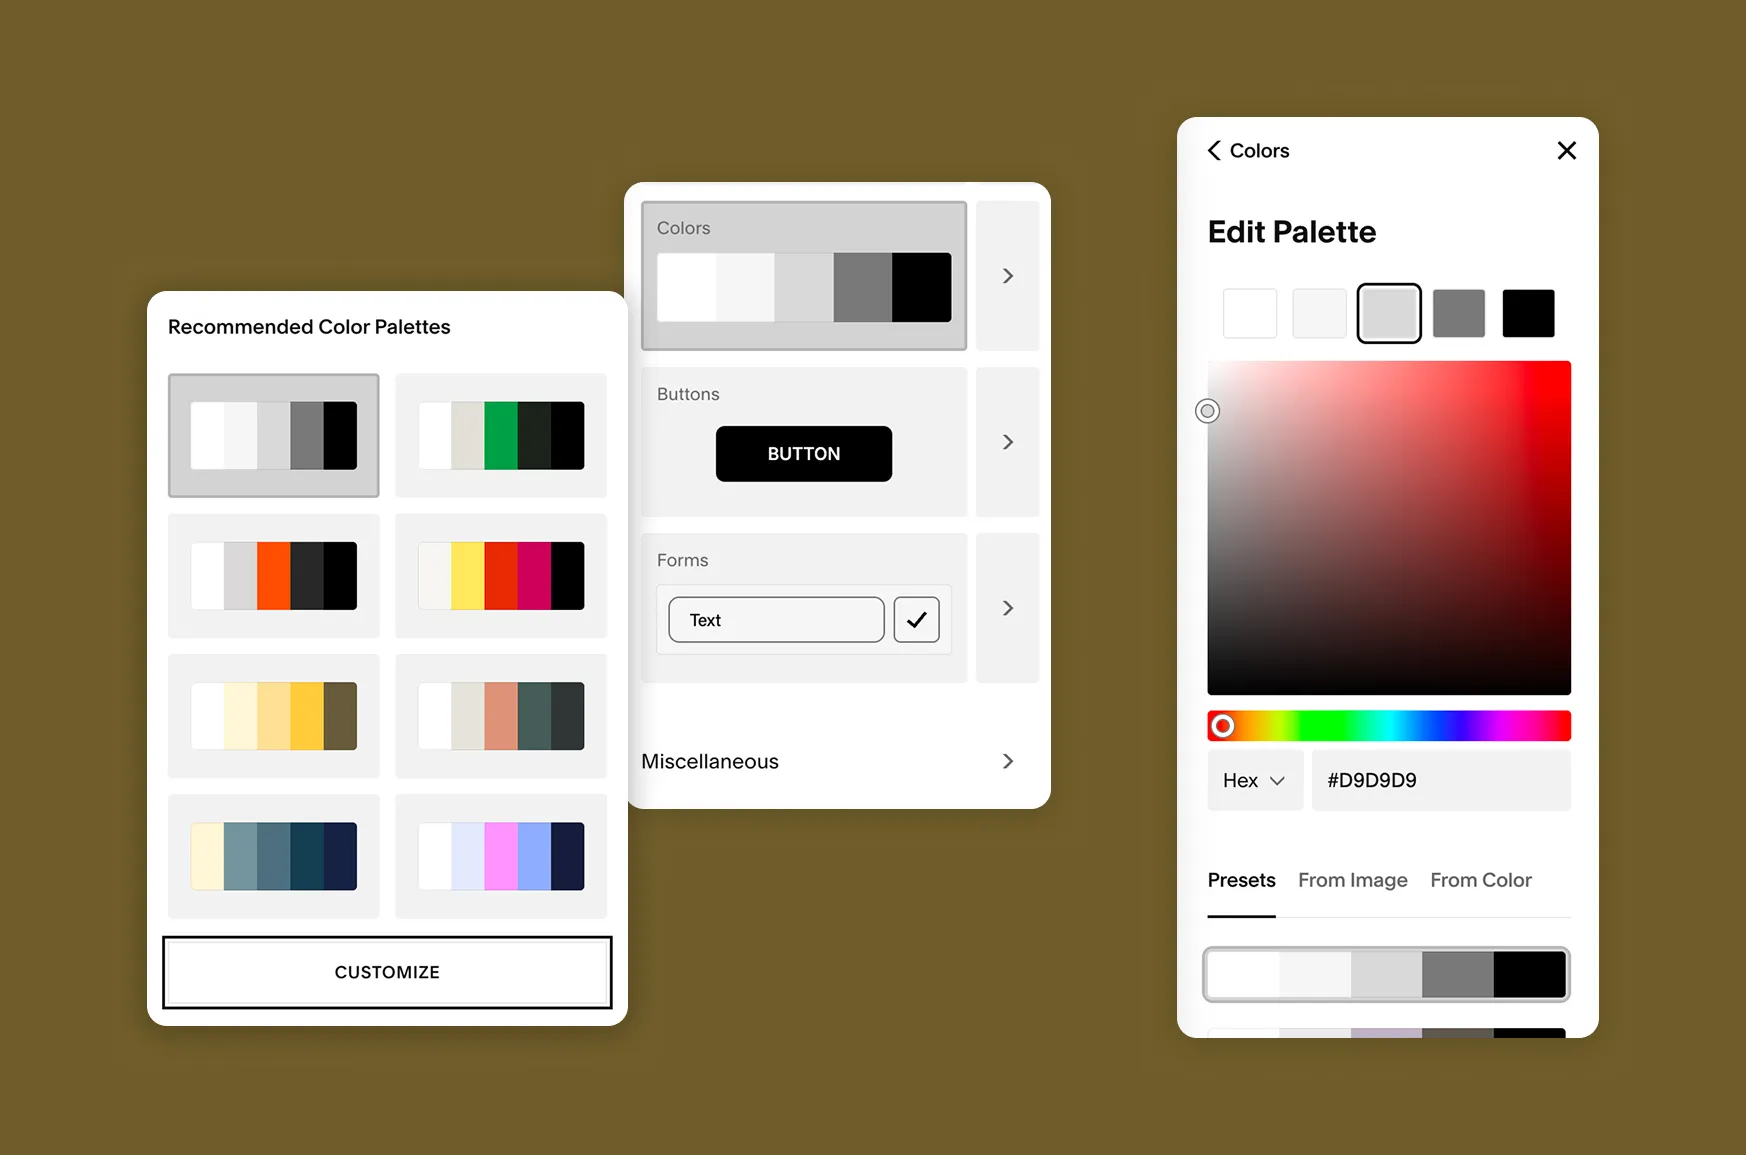
Click Edit Palette to choose or create your colour palette. You can start with a preset, generate one from an image, or create one from a colour you already use in your branding.
You can then adjust individual colours to get the look you want.
But there’s one thing that can be confusing at first: changing your palette doesn’t mean every section will have the same colour.
How Squarespace colour palettes work
Squarespace uses your palette to create different colour themes.
Think of it like this:
- Colour palette → the colours available to your site
- Colour themes → different combinations of those colours
- Sections → use one of those themes
For example, your palette might contain cream, black, green, and white. Most of your homepage could use a light theme, while a newsletter section uses a dark theme.
Both sections are still using colours from the same palette, so the design stays coordinated.
Change the colour of one section
What if you don’t want to change the whole site? You just want one section to look different.
Select the section you want to edit, then open its Colours settings and choose a different theme.
For example, you could keep your main page light and use a darker theme for a newsletter signup or call-to-action.
This changes the appearance of that section without changing your overall colour palette.
A simple rule to remember:
Styles = your site’s defaults.
Section settings = where you make exceptions.
Can I change the font for just one section?
You may be able to customize individual text styles depending on the element you’re editing and your Squarespace setup.
But for most websites, it’s better to keep your typography consistent. Set your main fonts globally and make local changes sparingly.
You can create plenty of visual variety through font size, weight, spacing, and colour without introducing a different font every few sections.
Before you finish
Once you’ve made your changes, take a quick look through your site.
- Check desktop and mobile. Make sure your text is comfortable to read at different screen sizes.
- Check contrast. Text should remain easy to read against your chosen backgrounds.
- Keep your fonts simple. One heading font and one body font are usually enough.
- Check buttons and links. Make sure they still stand out and work as expected.
- Preview the whole page. A change that looks good in one section should still feel right when you see the entire page.
Troubleshooting
- I changed my colours, but one section didn’t change. Check which colour theme that section is using. It may have its own section-specific theme.
- I can’t find the font setting I want. Try previewing a different page. The options shown in the Fonts panel can depend on the page you’re currently viewing.
- Everything looks too colourful. Go back to your palette and simplify it. You don’t need to use every colour everywhere.
- My font looks different on mobile. Check your mobile preview and adjust your typography settings if necessary.
Make your template feel like your brand
You don’t need to redesign your Squarespace template from scratch. Start with your global fonts and colour palette, then use section-specific styling when you want to highlight something or create contrast.
Once you understand the difference between site-wide styles and section styles, customizing your template becomes much easier.
And if you’d rather start with fonts and colours already chosen for you, templates like Nucleus come with a considered palette and font pairing built in, so you can focus on your content from day one.