A Squarespace client intake form collects the details you need before you speak to a new client, so your first call can focus on their project rather than basic questions. It also stops the back-and-forth emails that start with “Can you tell me a bit more about what you need?”
This tutorial walks through how to build one using Squarespace’s built-in form block: what to ask, how to set it up, where submissions go, and how to test it before a real client uses it.
What a Squarespace client intake form should ask
Plan your questions before opening the editor. A good intake form helps you understand what a potential client needs, decide whether you can help, and prepare for the first call. You don’t need to ask everything upfront.
Aim for 6–8 fields. For a service business, this is a good starting point:
- Name and email (required)
- Phone number (optional)
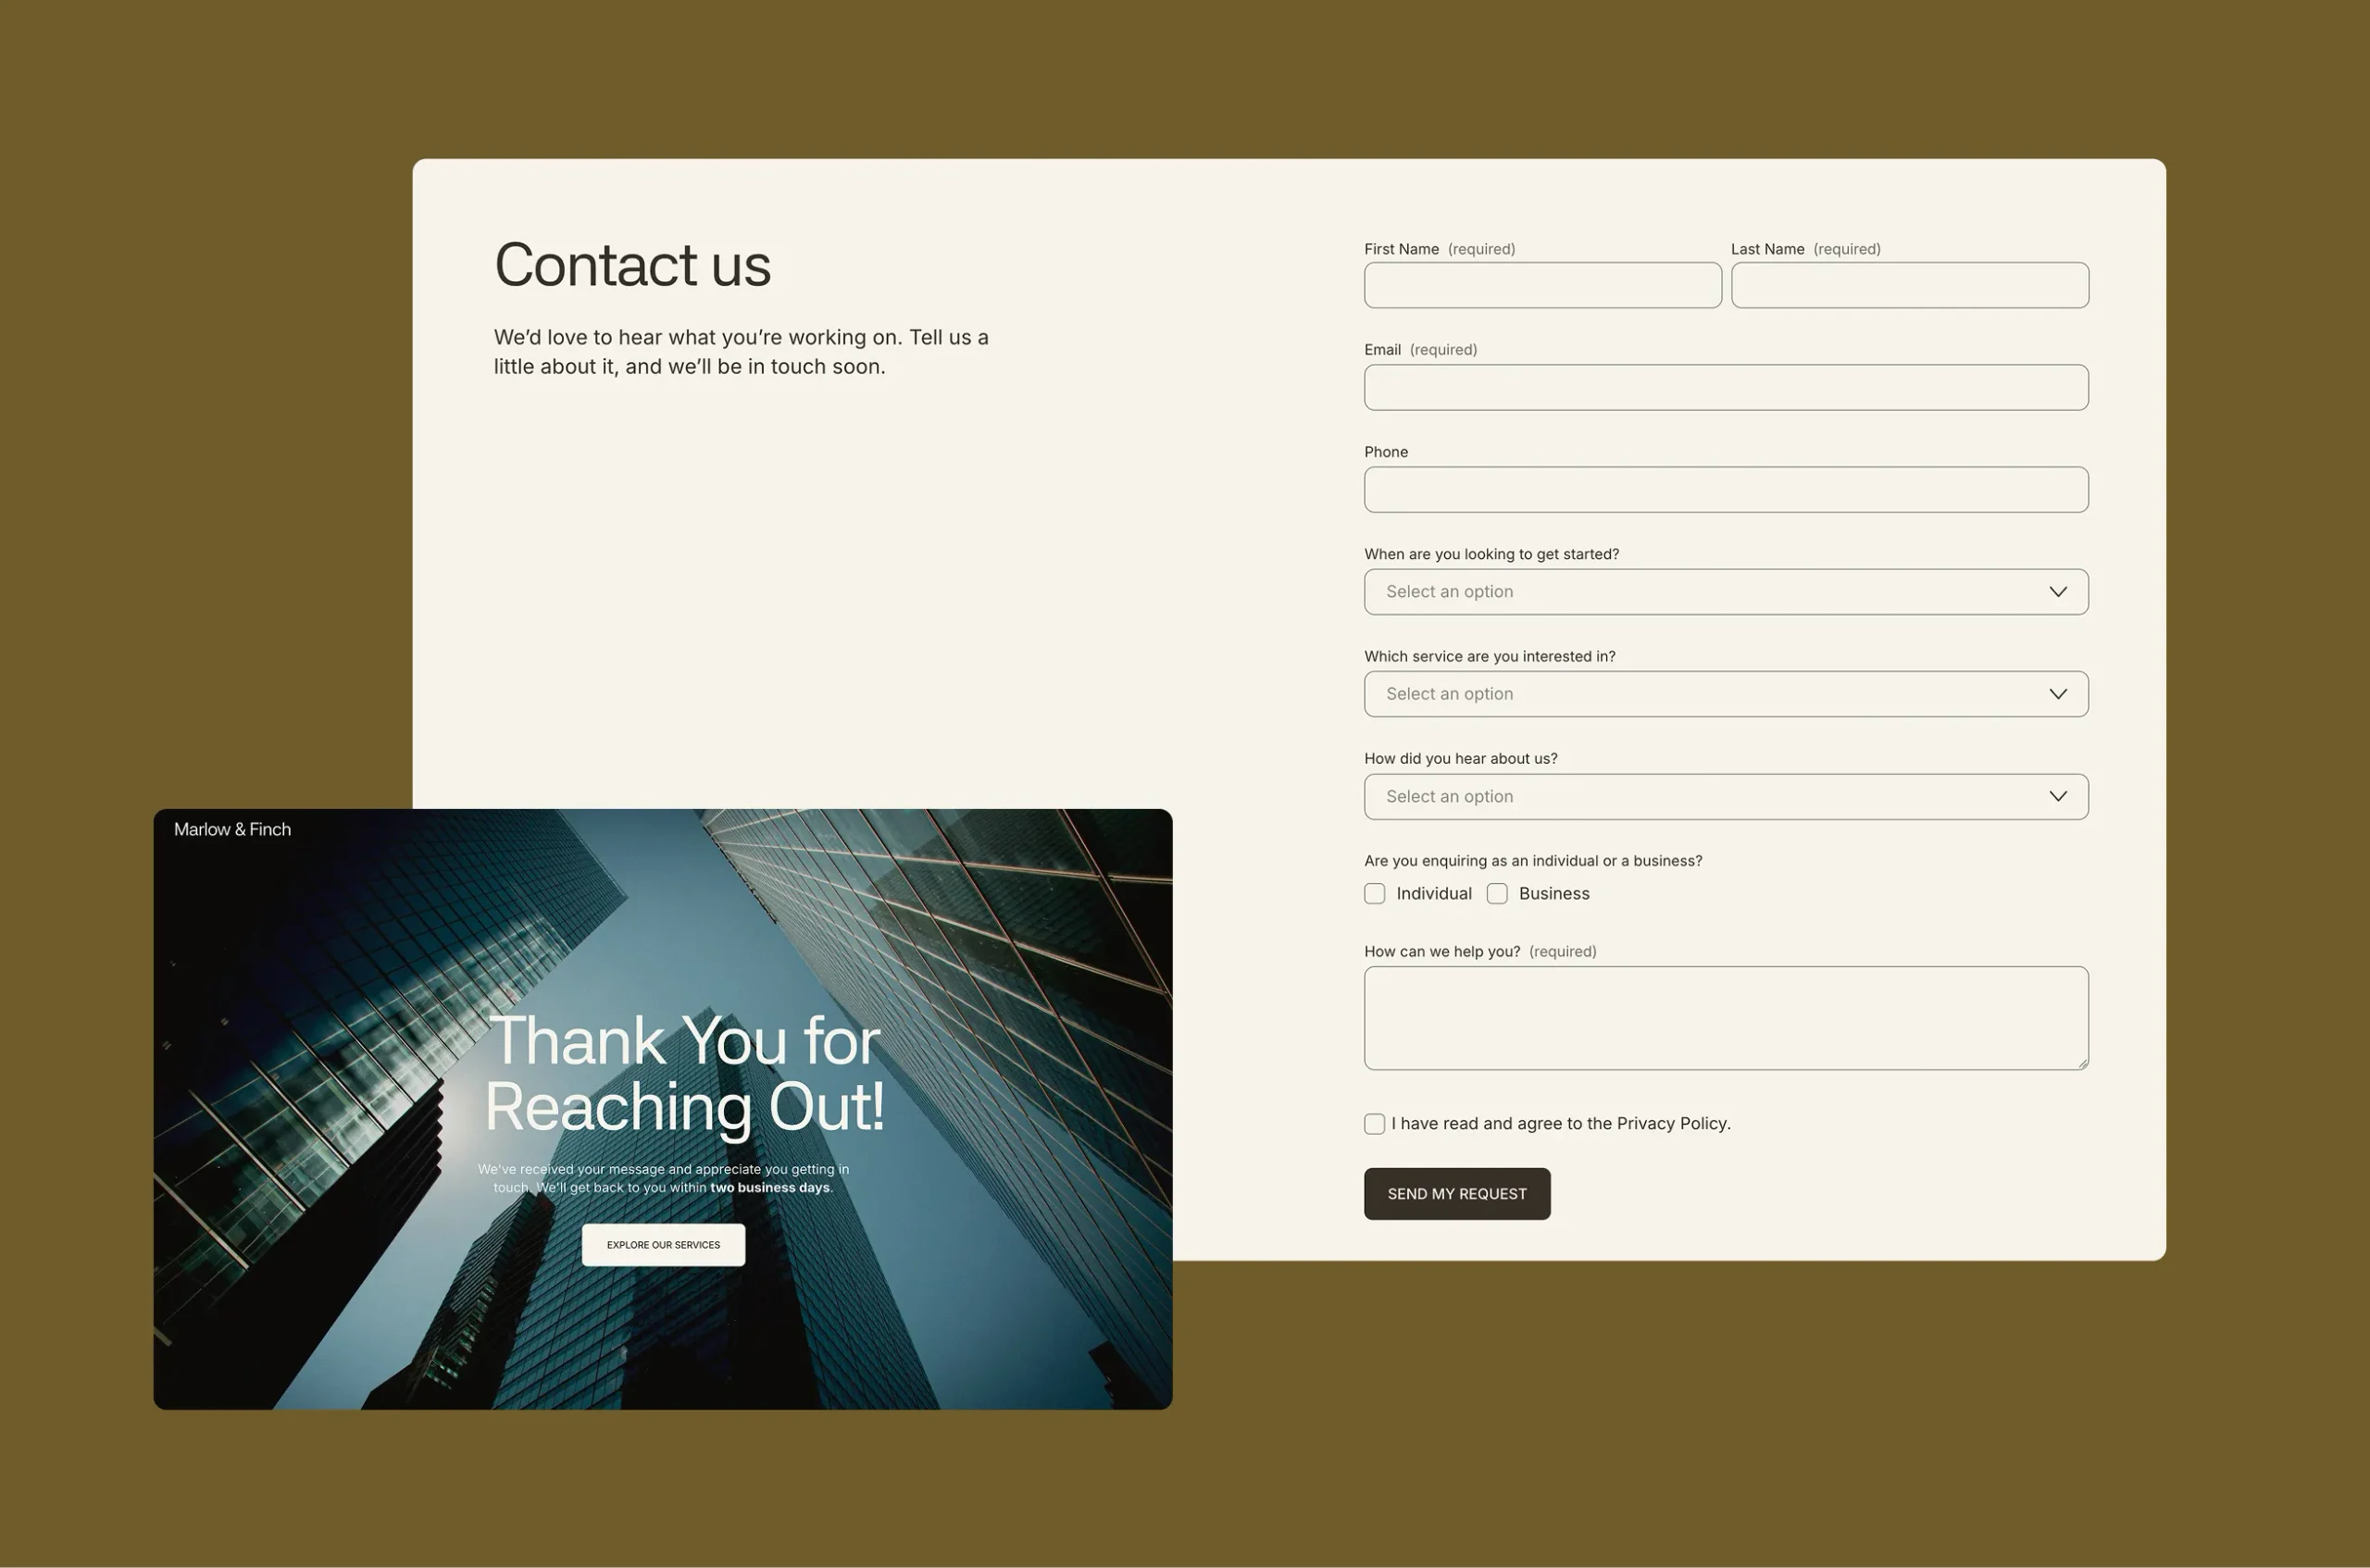
- Which service are you interested in?, using a dropdown for one choice or checkboxes for multiple choices. Separating branding enquiries from website enquiries, for example, helps you prepare for the conversation.
- Are you enquiring as an individual or a business?, using a radio choice if the distinction matters to your services
- How can we help you?, using a multi-line text field for a brief description
- When are you looking to get started?, using a dropdown with options such as “As soon as possible,” “Within 1–3 months,” or “Just exploring”
- How did you hear about us?, using a dropdown if you want to track where enquiries come from
Every extra field can give someone another reason to abandon the form. If you won’t use the answer to assess the enquiry or prepare for the first call, leave it out.
Step 1: Add a form block or section to your page
Open the page where you want the form to appear. A dedicated Contact or Get Started page works well.
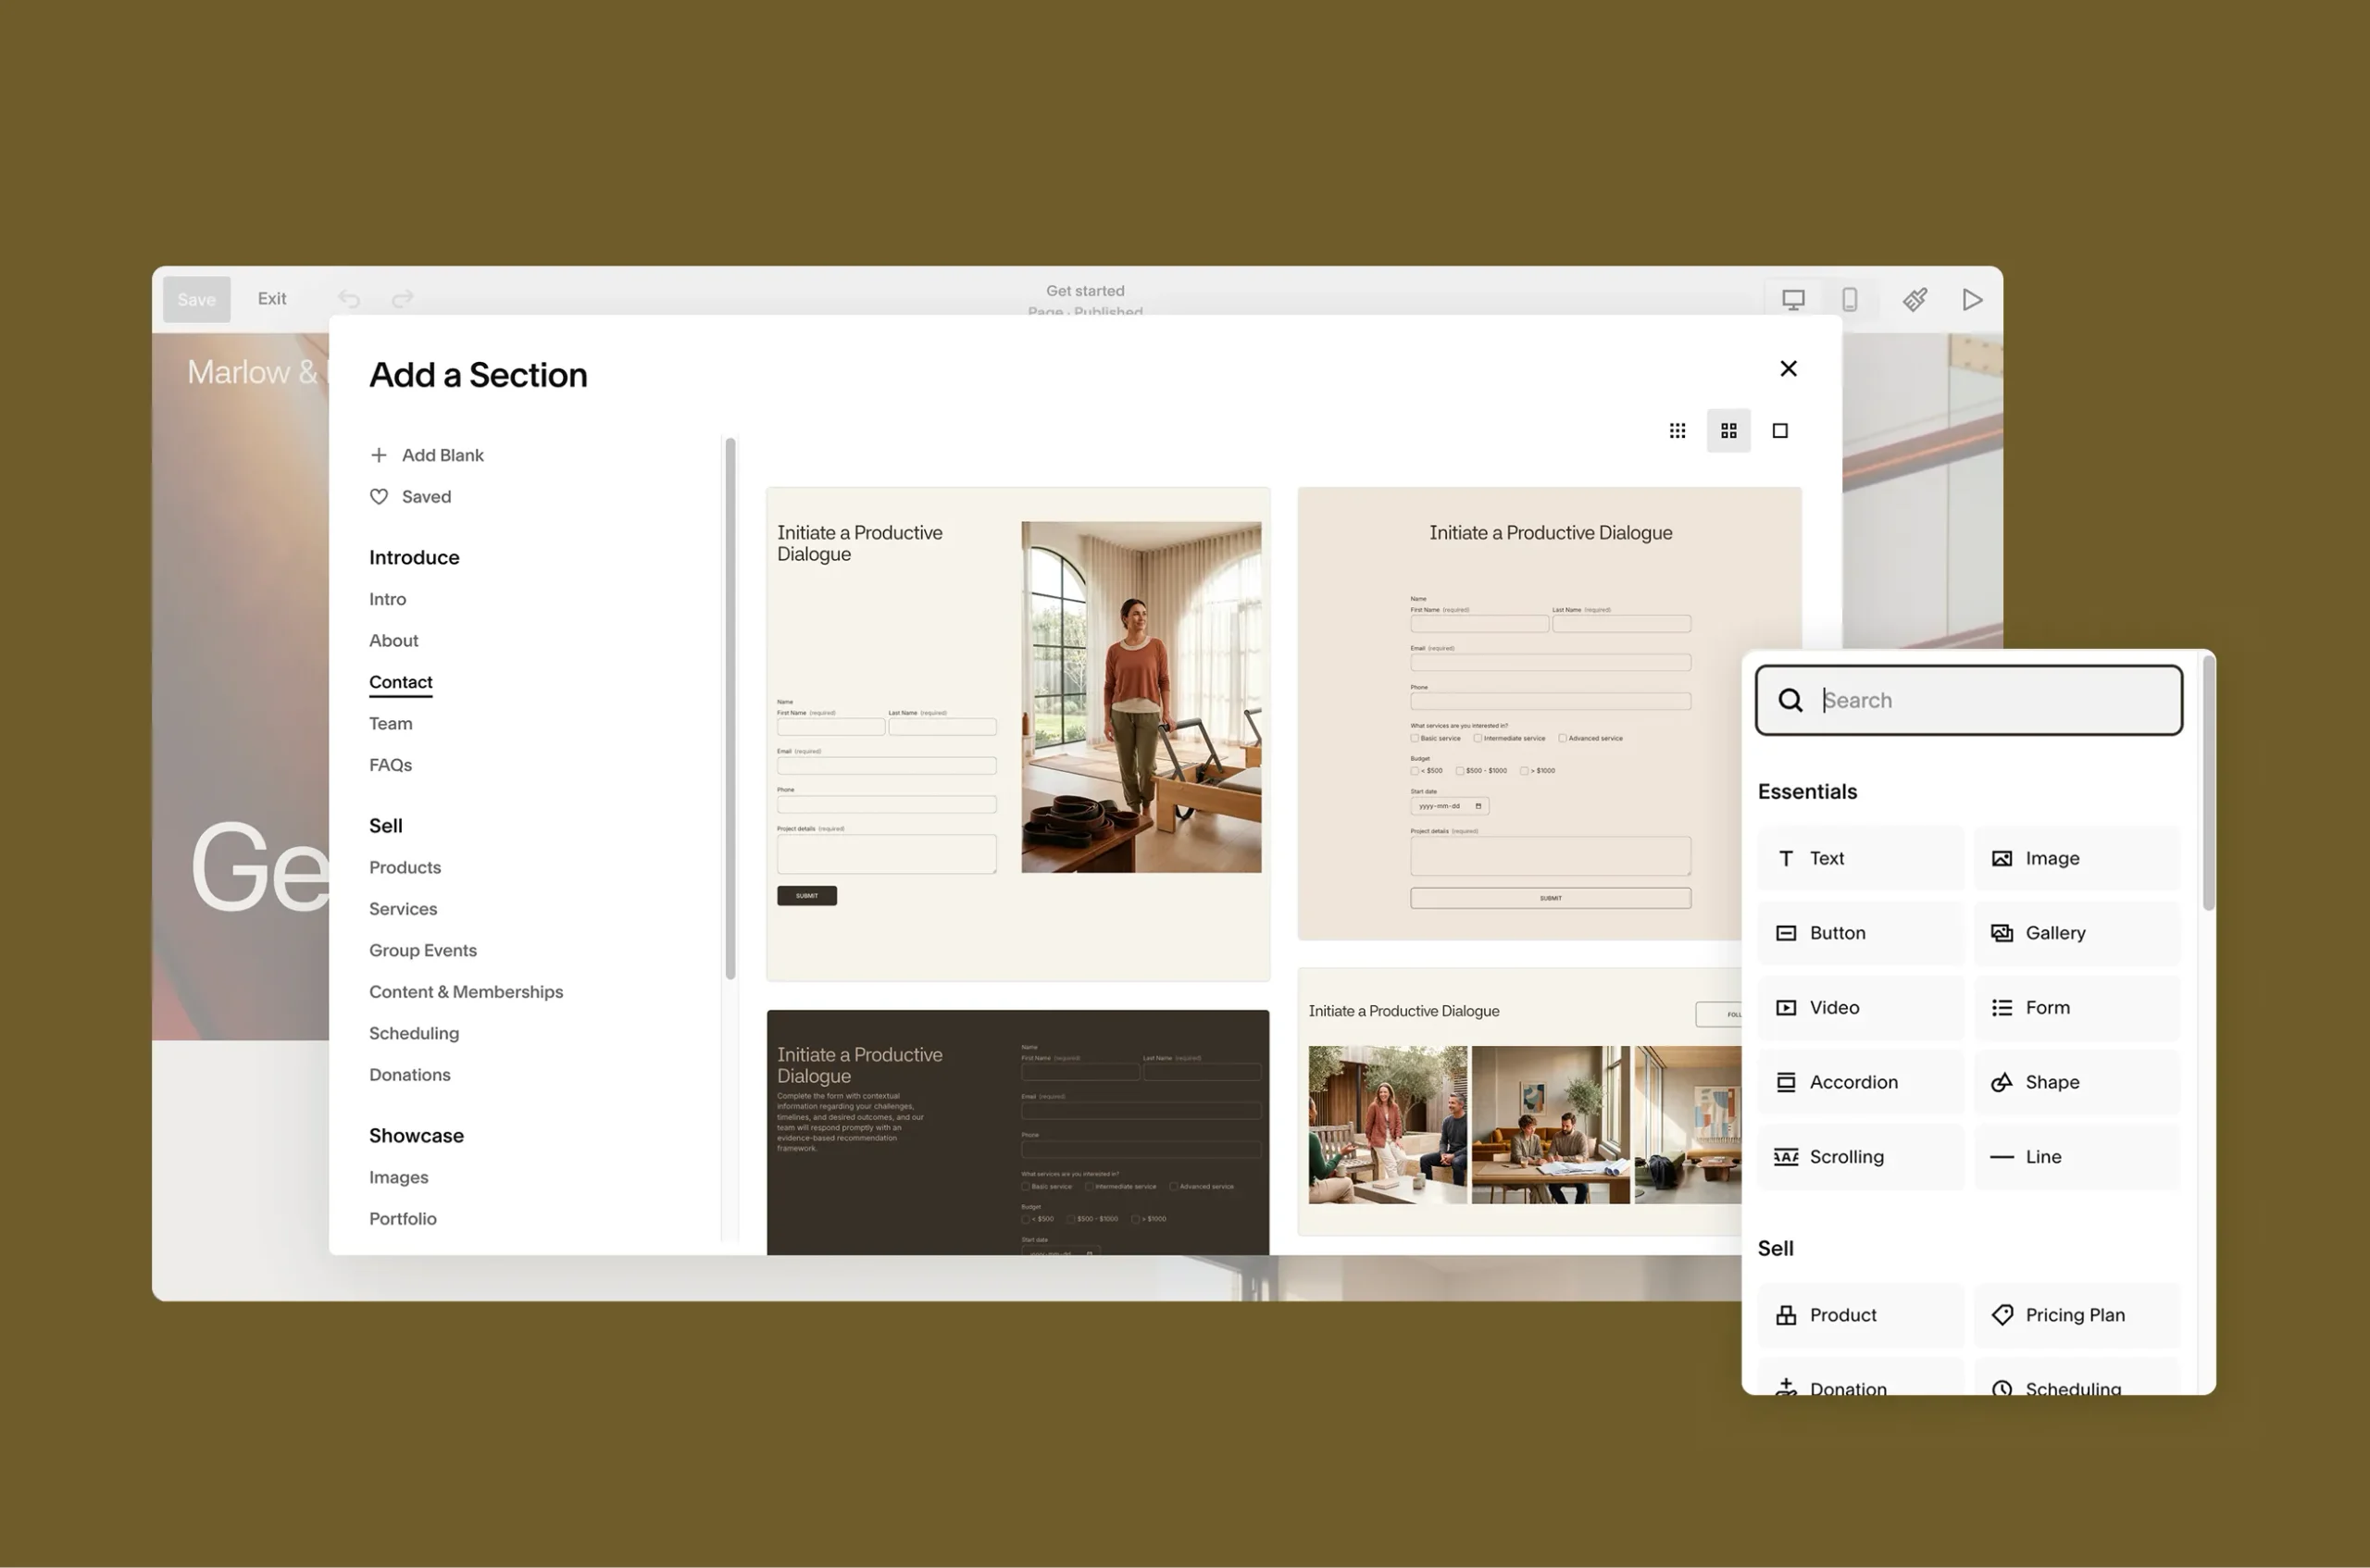
Click Edit, then choose one of these options:
- Add a Form block where you want the form to appear.
- Add a section and choose a Contact layout that includes a form.
Squarespace adds a default form with fields for name, email, subject, and message. You can customize these fields in the next step.
Step 2: Edit the fields
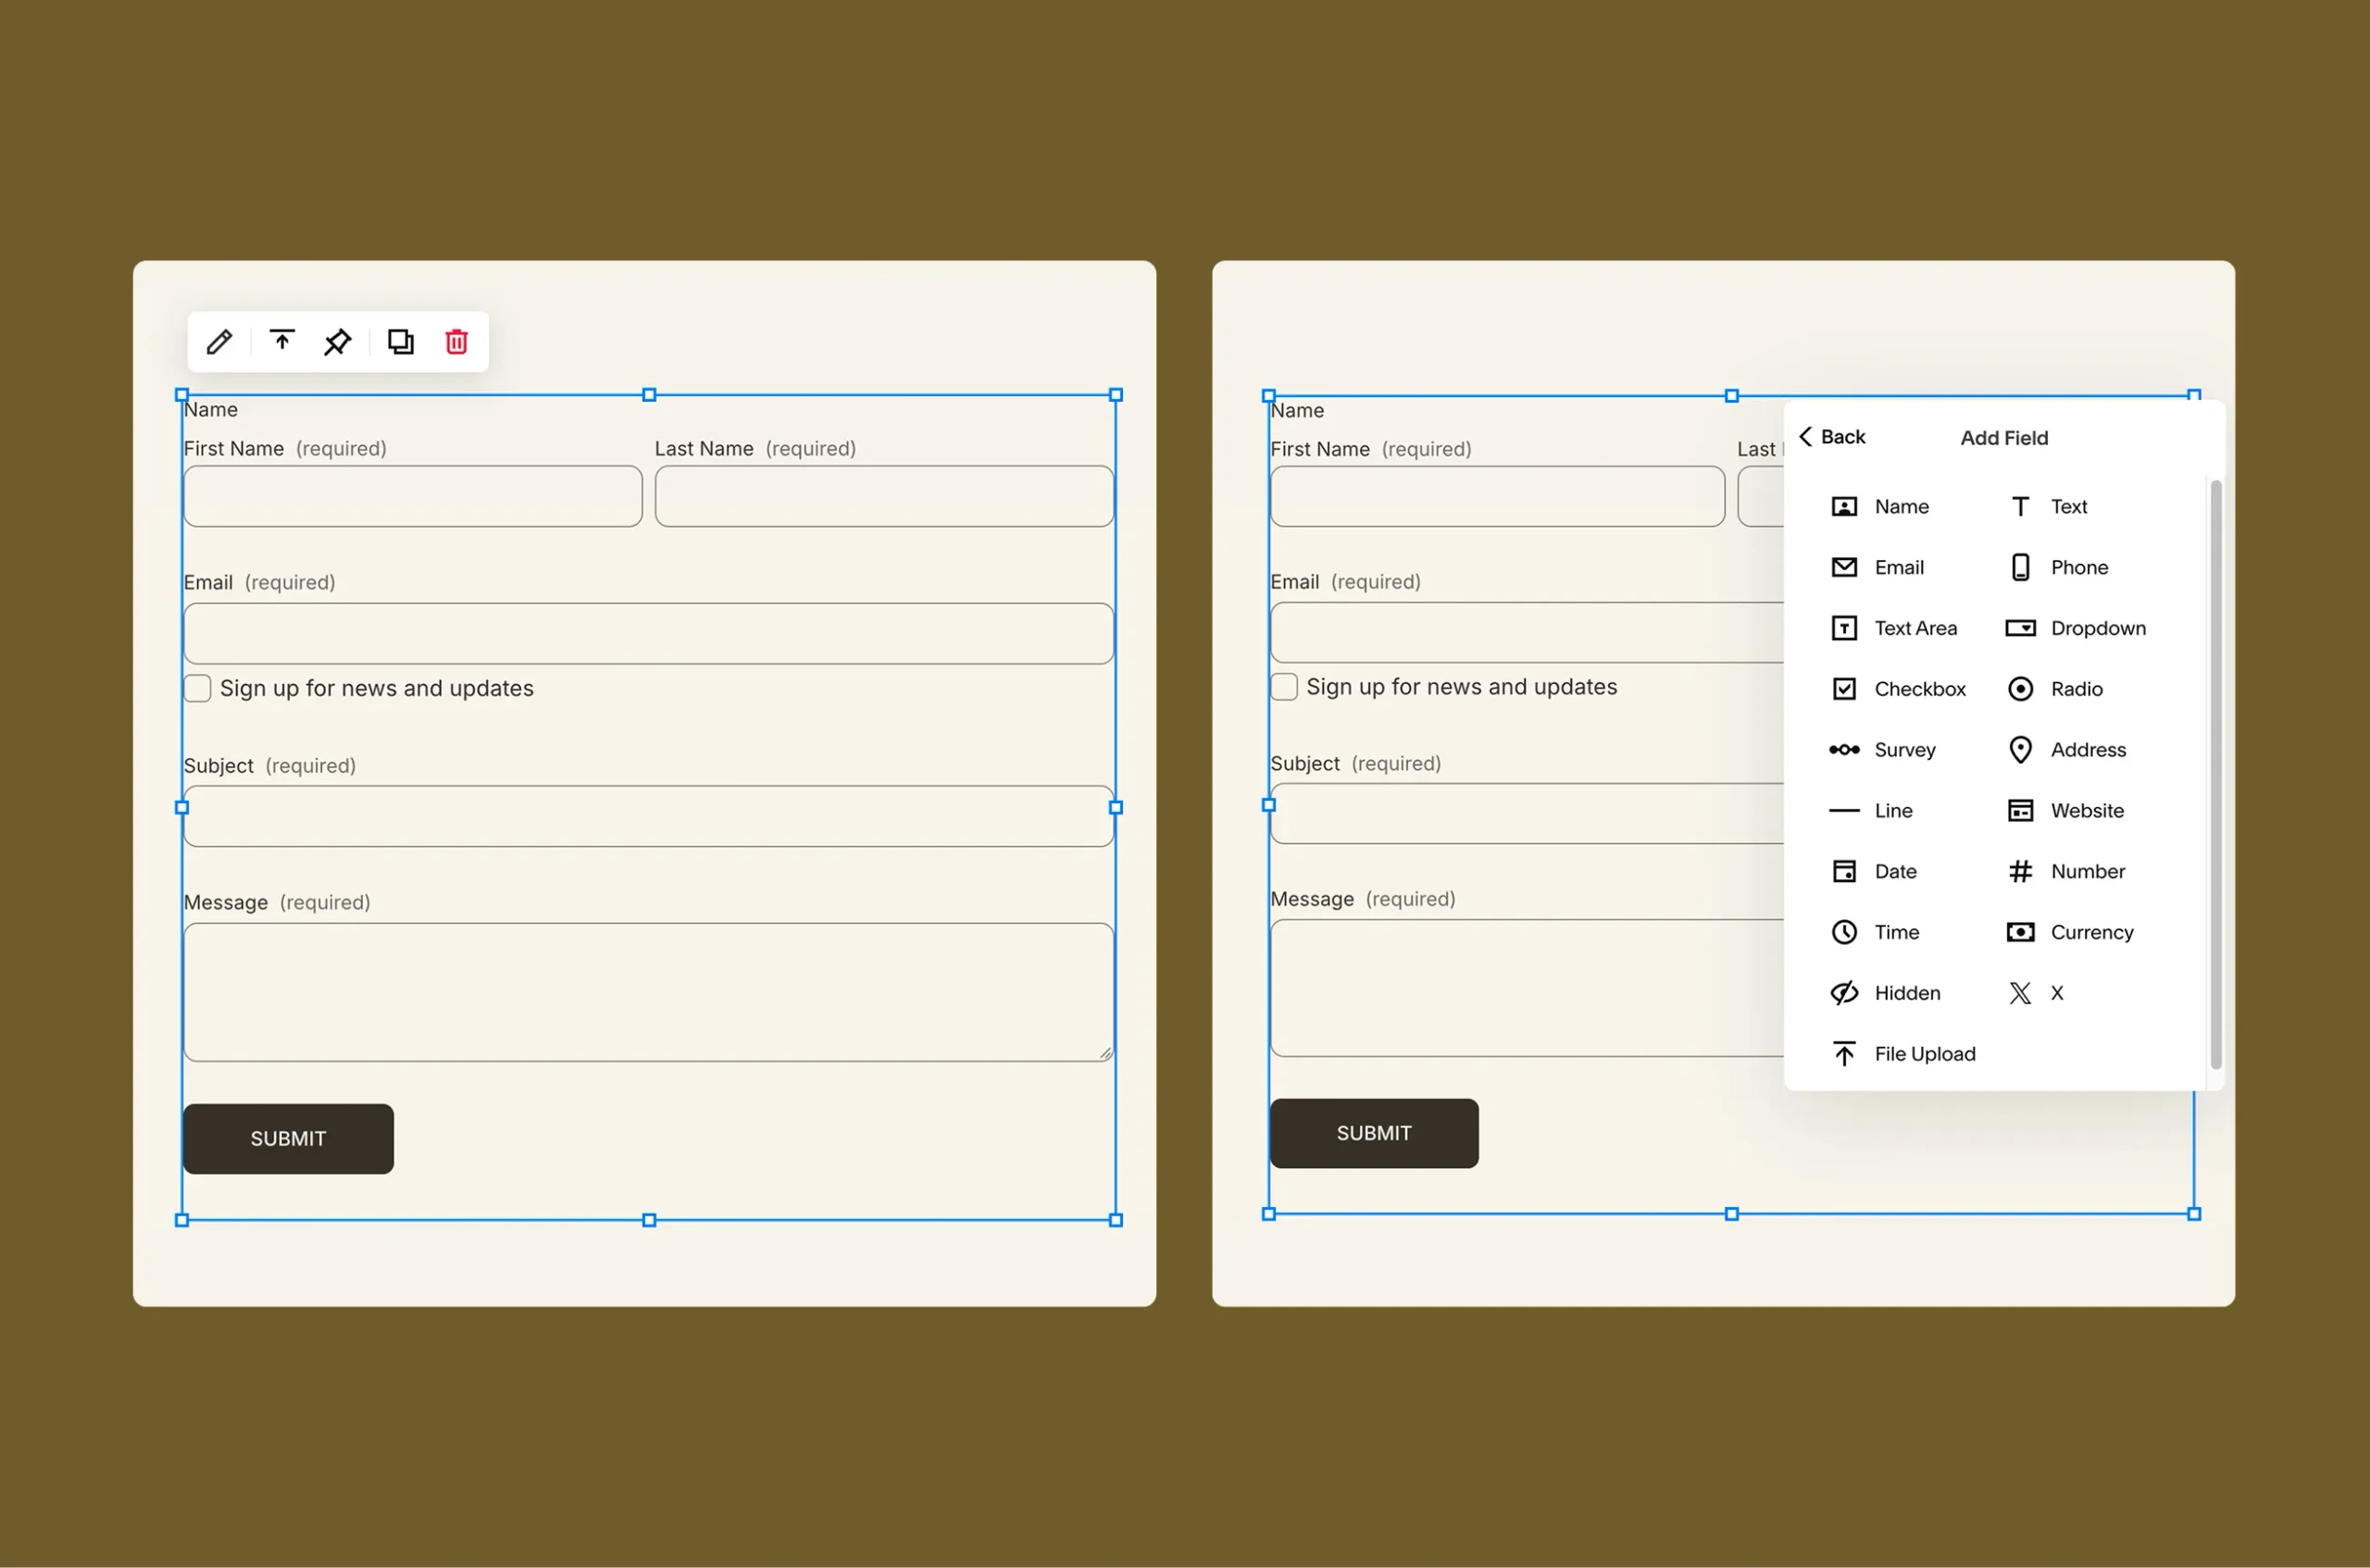
Click the form block, then click the pencil icon to open the form settings. In the content settings, you can add, remove and reorder fields.
The form block supports these field types:
- Single-line and multi-line text
- Email and phone number
- Dropdown, radio buttons and checkboxes
- Date and time
- File upload
- And more
Mark a field as required only if you cannot work without the answer. Add a short description under a field when the question might be unclear. Keep the field labels in plain language, such as “How can we help you?”
A file upload field can be useful for a project brief or a logo. Avoid it for sensitive documents (more on that below).
Step 3: Write the form text and the confirmation message
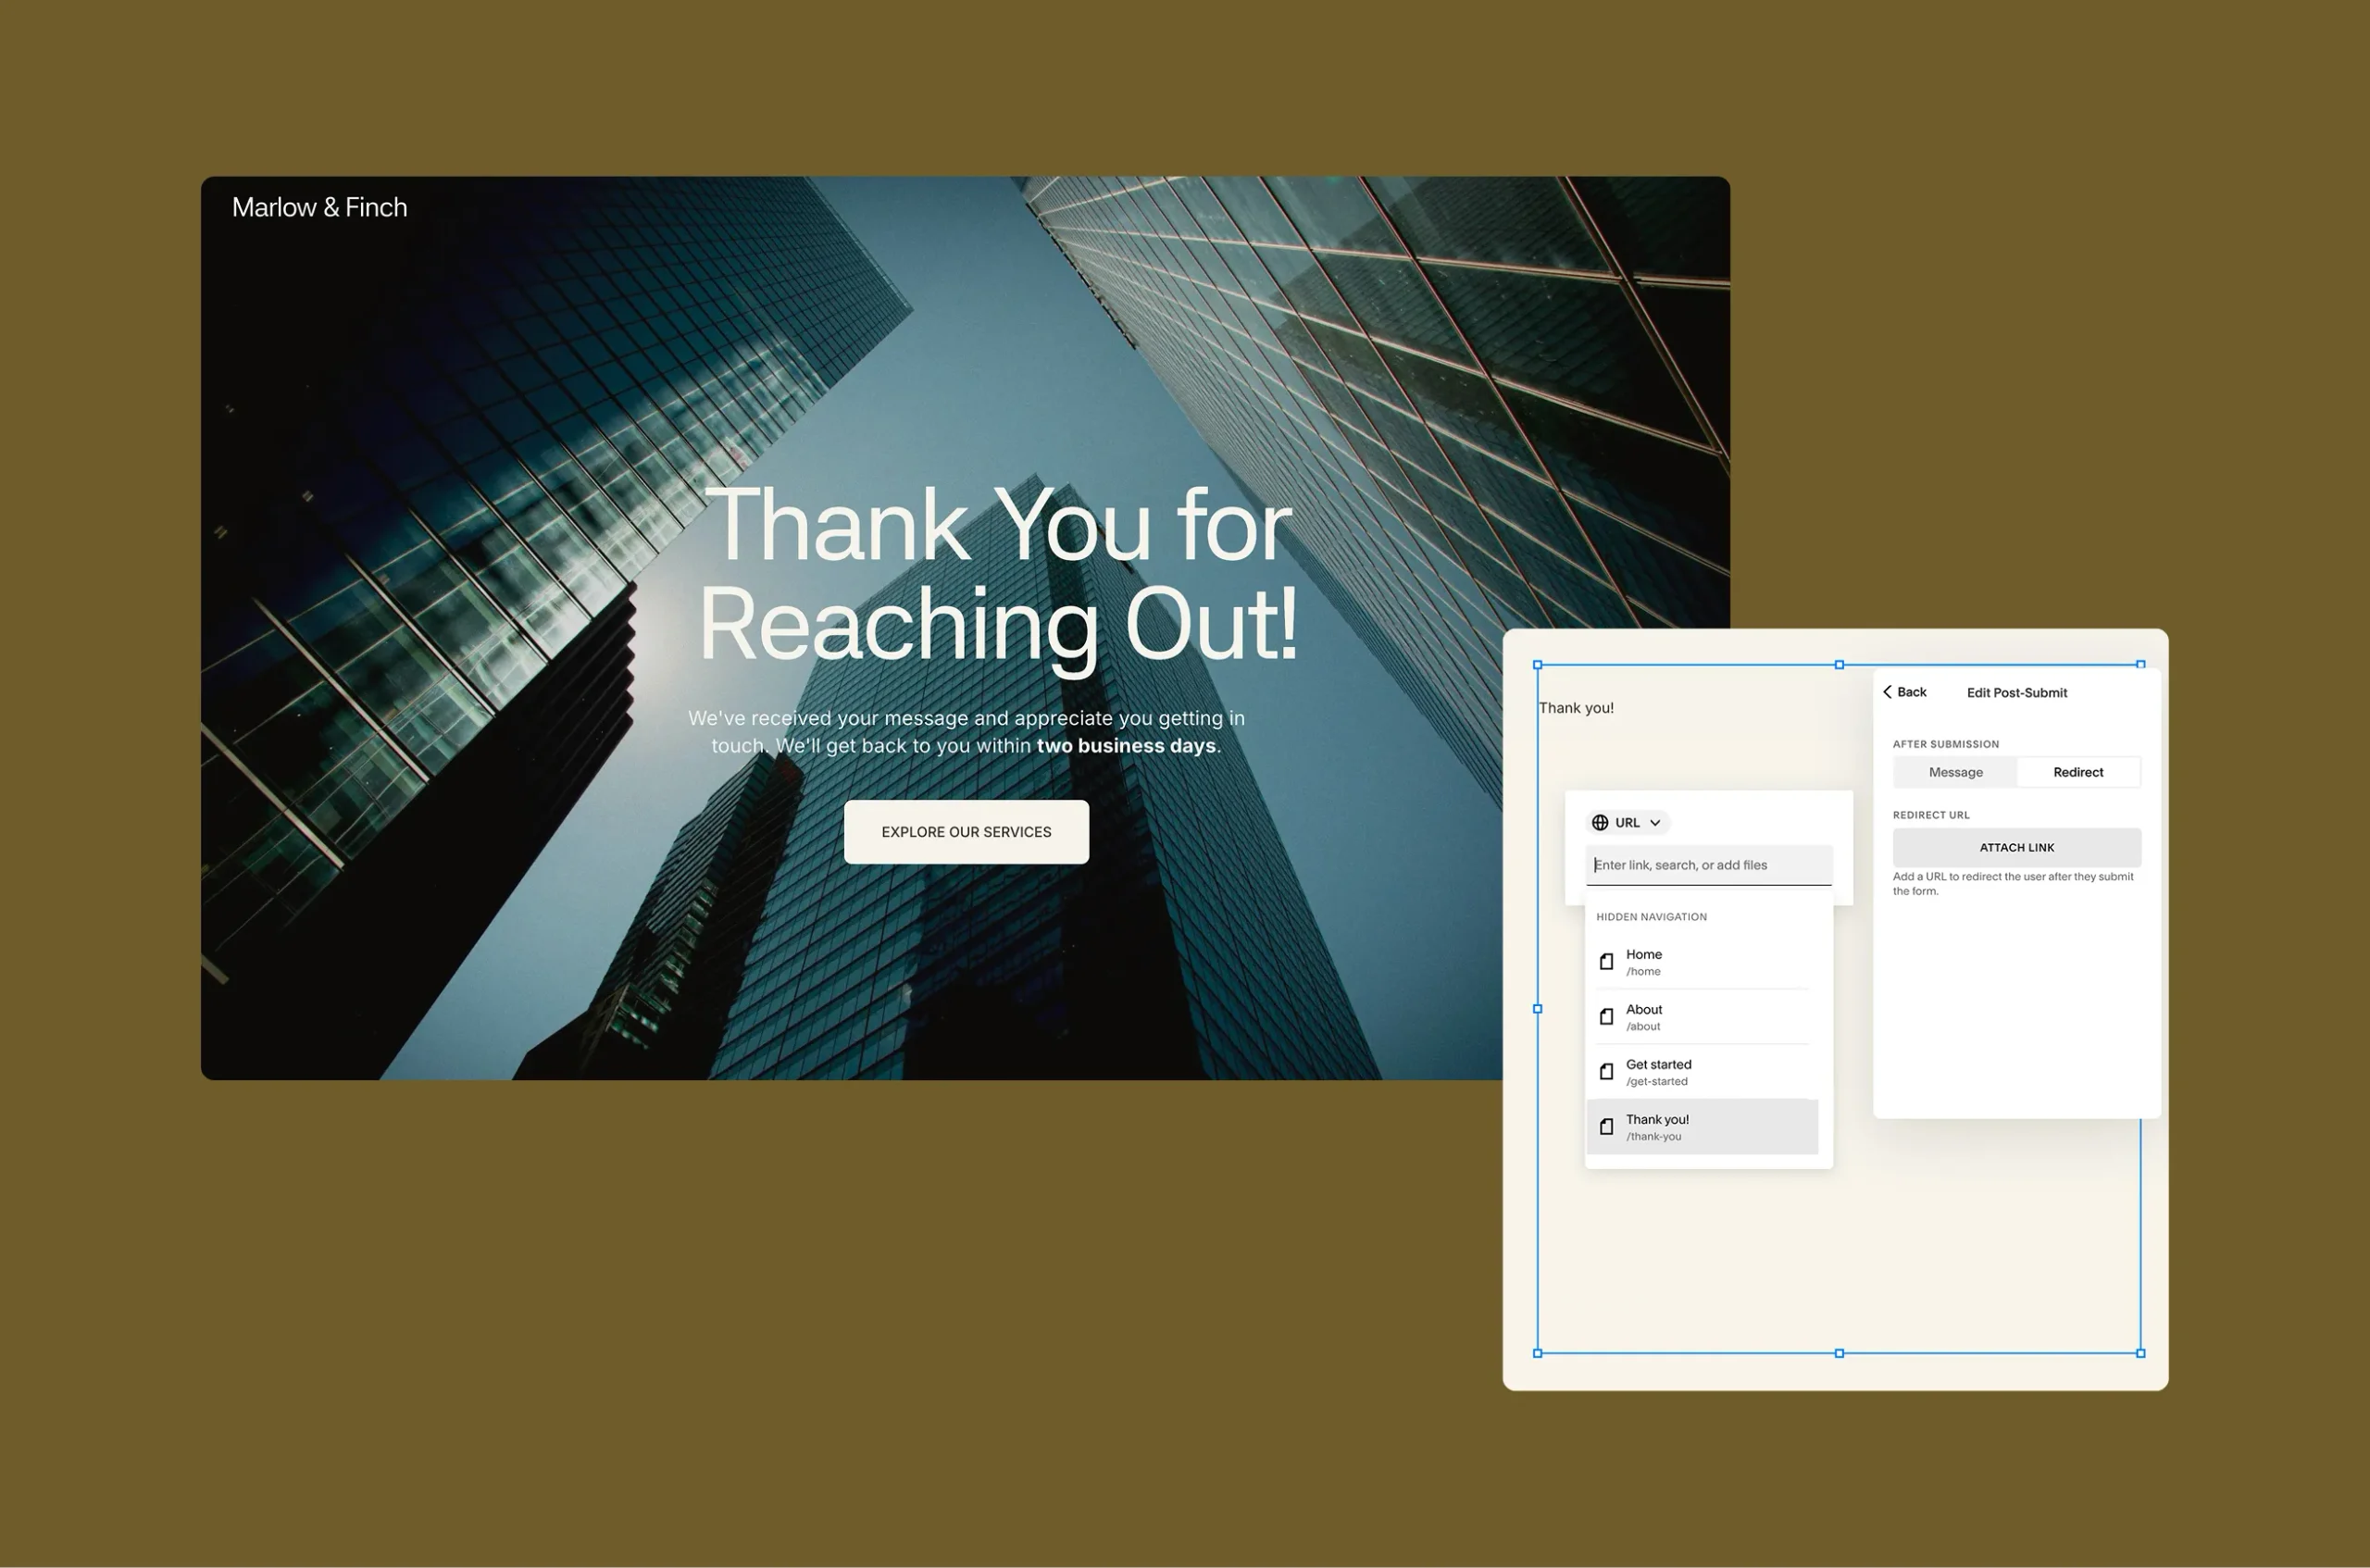
Add a short line above the form that says what happens next, for example: “Tell us about your project. We’ll reply within two business days.” Only promise a response time you can consistently meet.
After submission, either show a simple thank-you message or redirect visitors to a thank-you page. Confirm that their message was received and explain when they can expect a reply. For example: “Thanks for reaching out! We’ve received your message and will reply within two business days.”
Change the button text from “Submit” to something specific, such as “Send my request.”
Step 4: Choose where submissions go
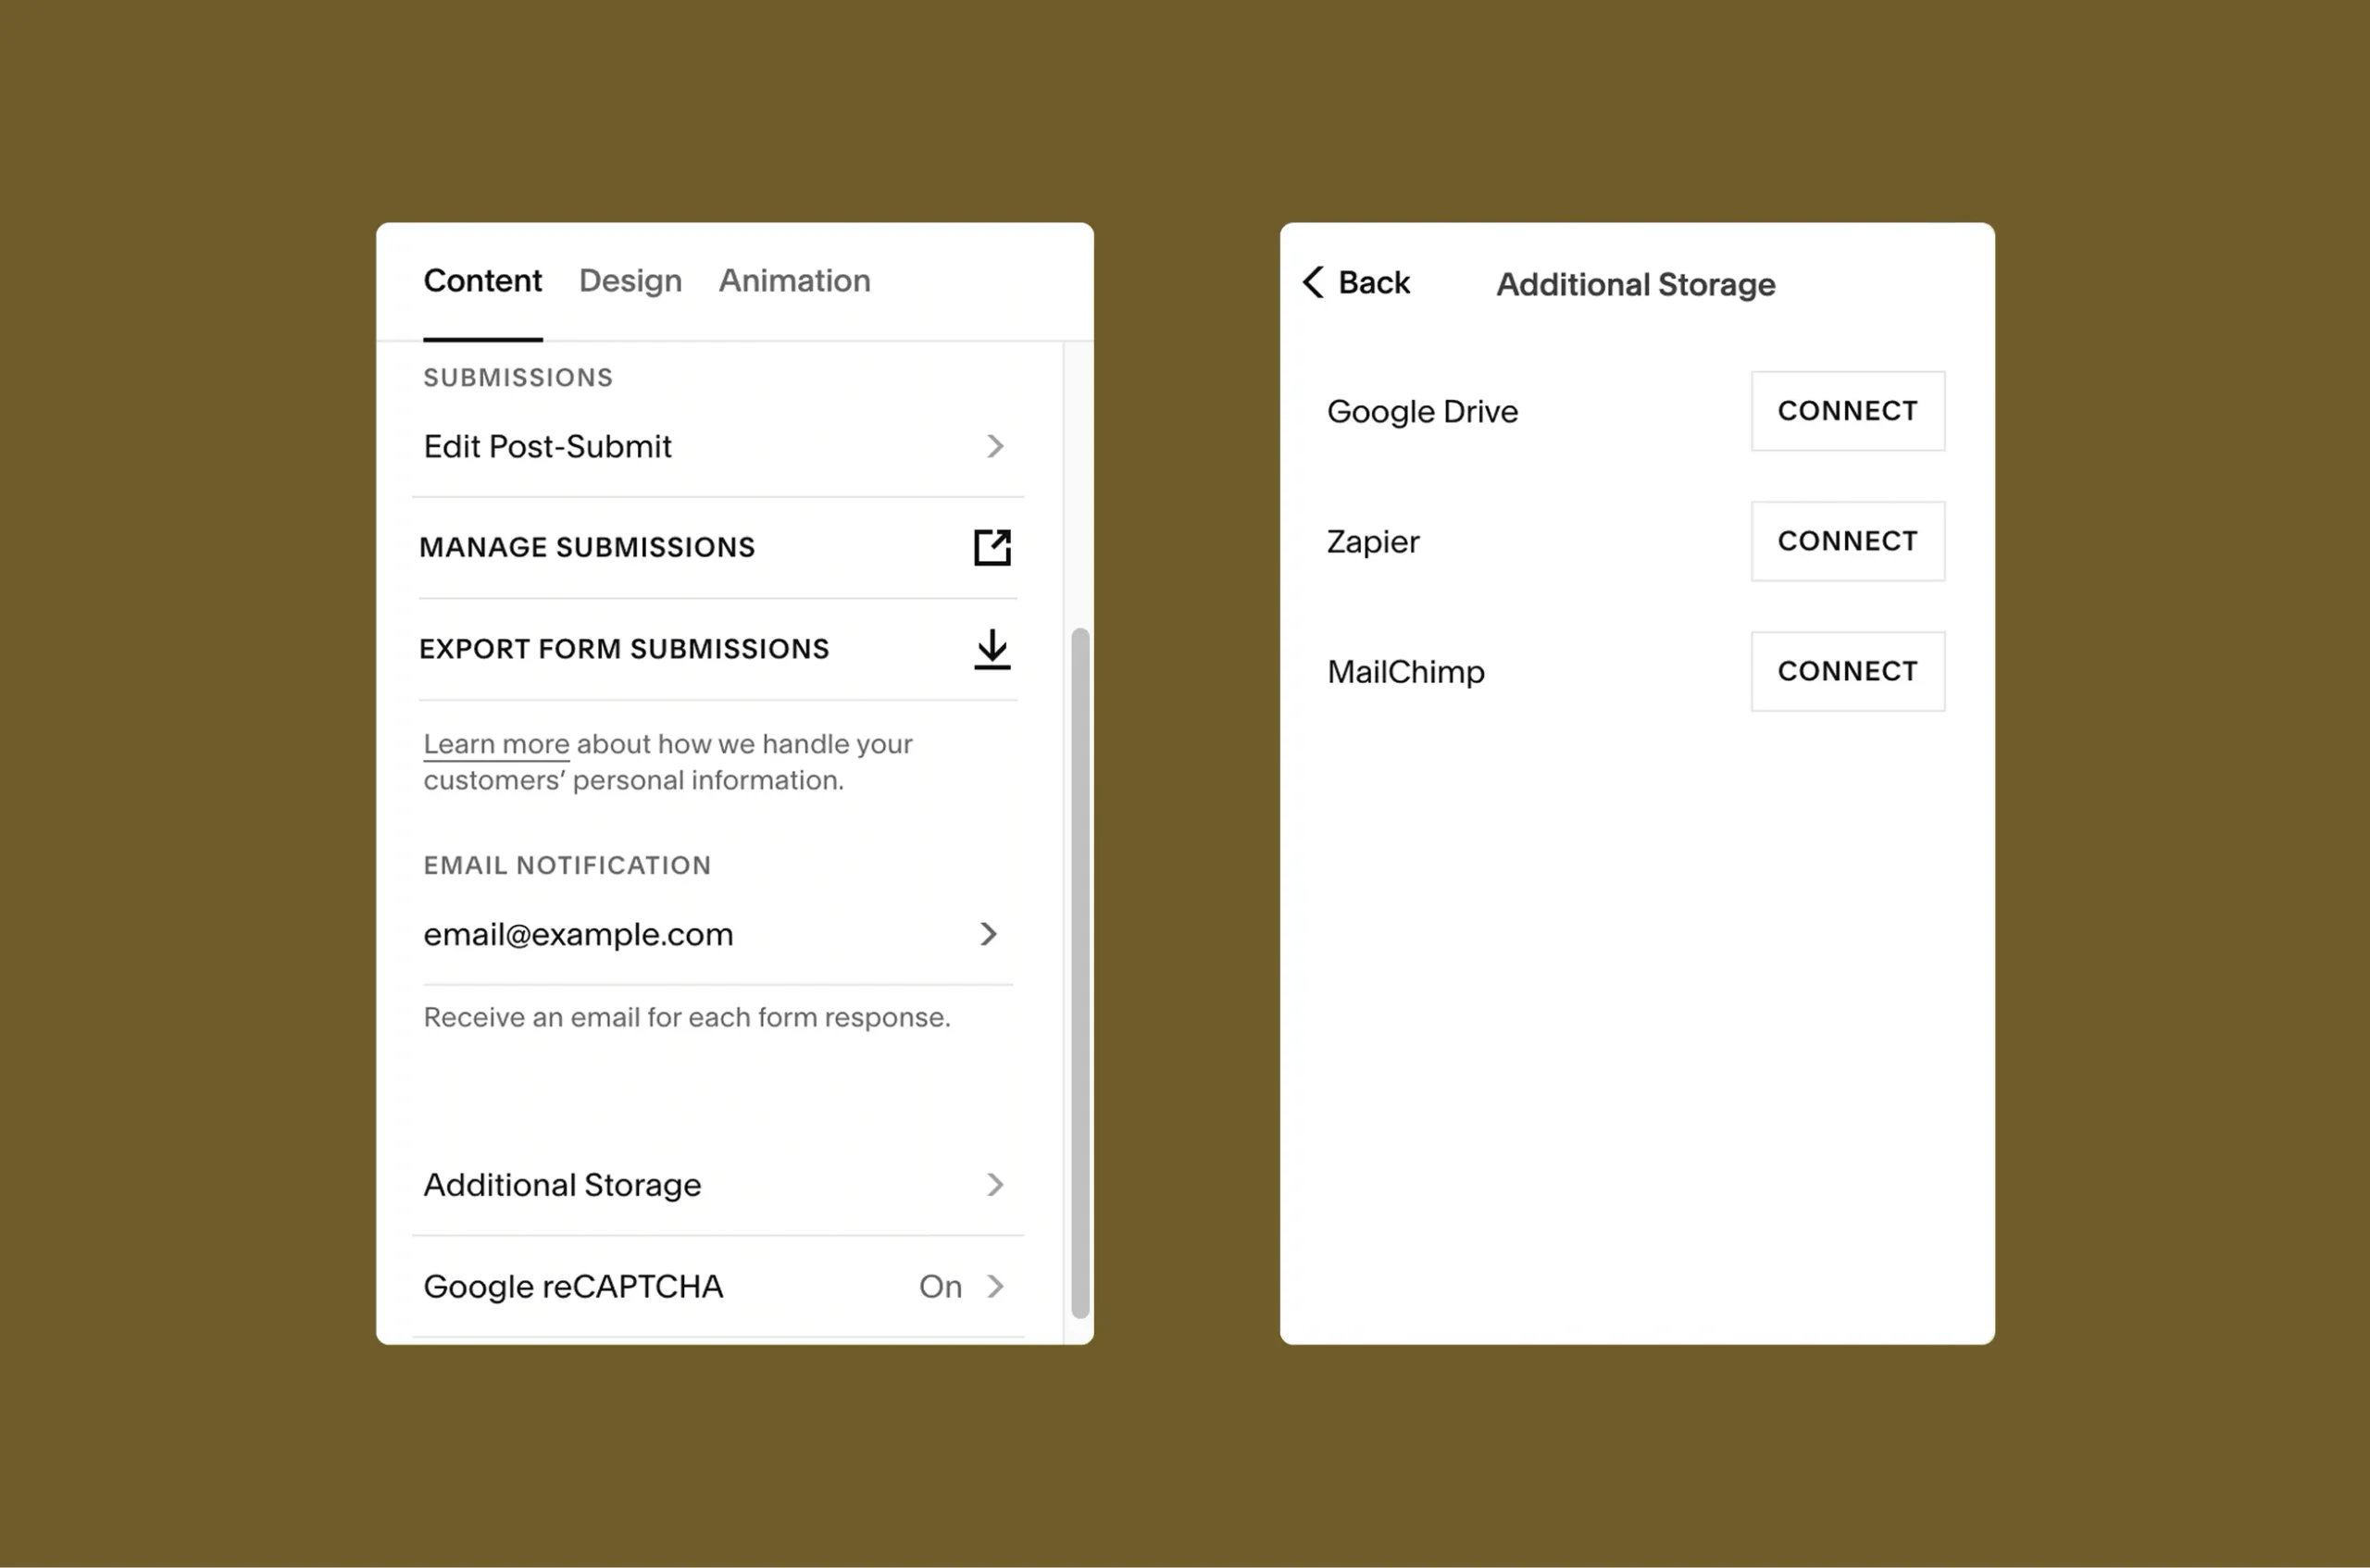
Open the Storage tab of the form settings. This is where you decide what happens to each submission. Common options are:
- Email notification to you or a shared inbox
- Google Sheets, which keeps a running log of every submission
- Mailchimp or Squarespace Email Campaigns, if you want to add people to a list
- Zapier, if you want to send submissions into other tools
Set up the email notification first. Then, if you want a second record of every submission, connect Google Sheets. It gives you an additional copy, though it does not guarantee that nothing goes missing, so keep testing. If you receive only a few enquiries a month, a working notification and one stored copy are enough. More integrations add complexity you may not need. You can also export submissions from the Storage settings as a CSV file.
If you use the same form on several pages, add a hidden field that records the page the visitor came from. It tells you which page produces the most enquiries.
Step 5: Style the form
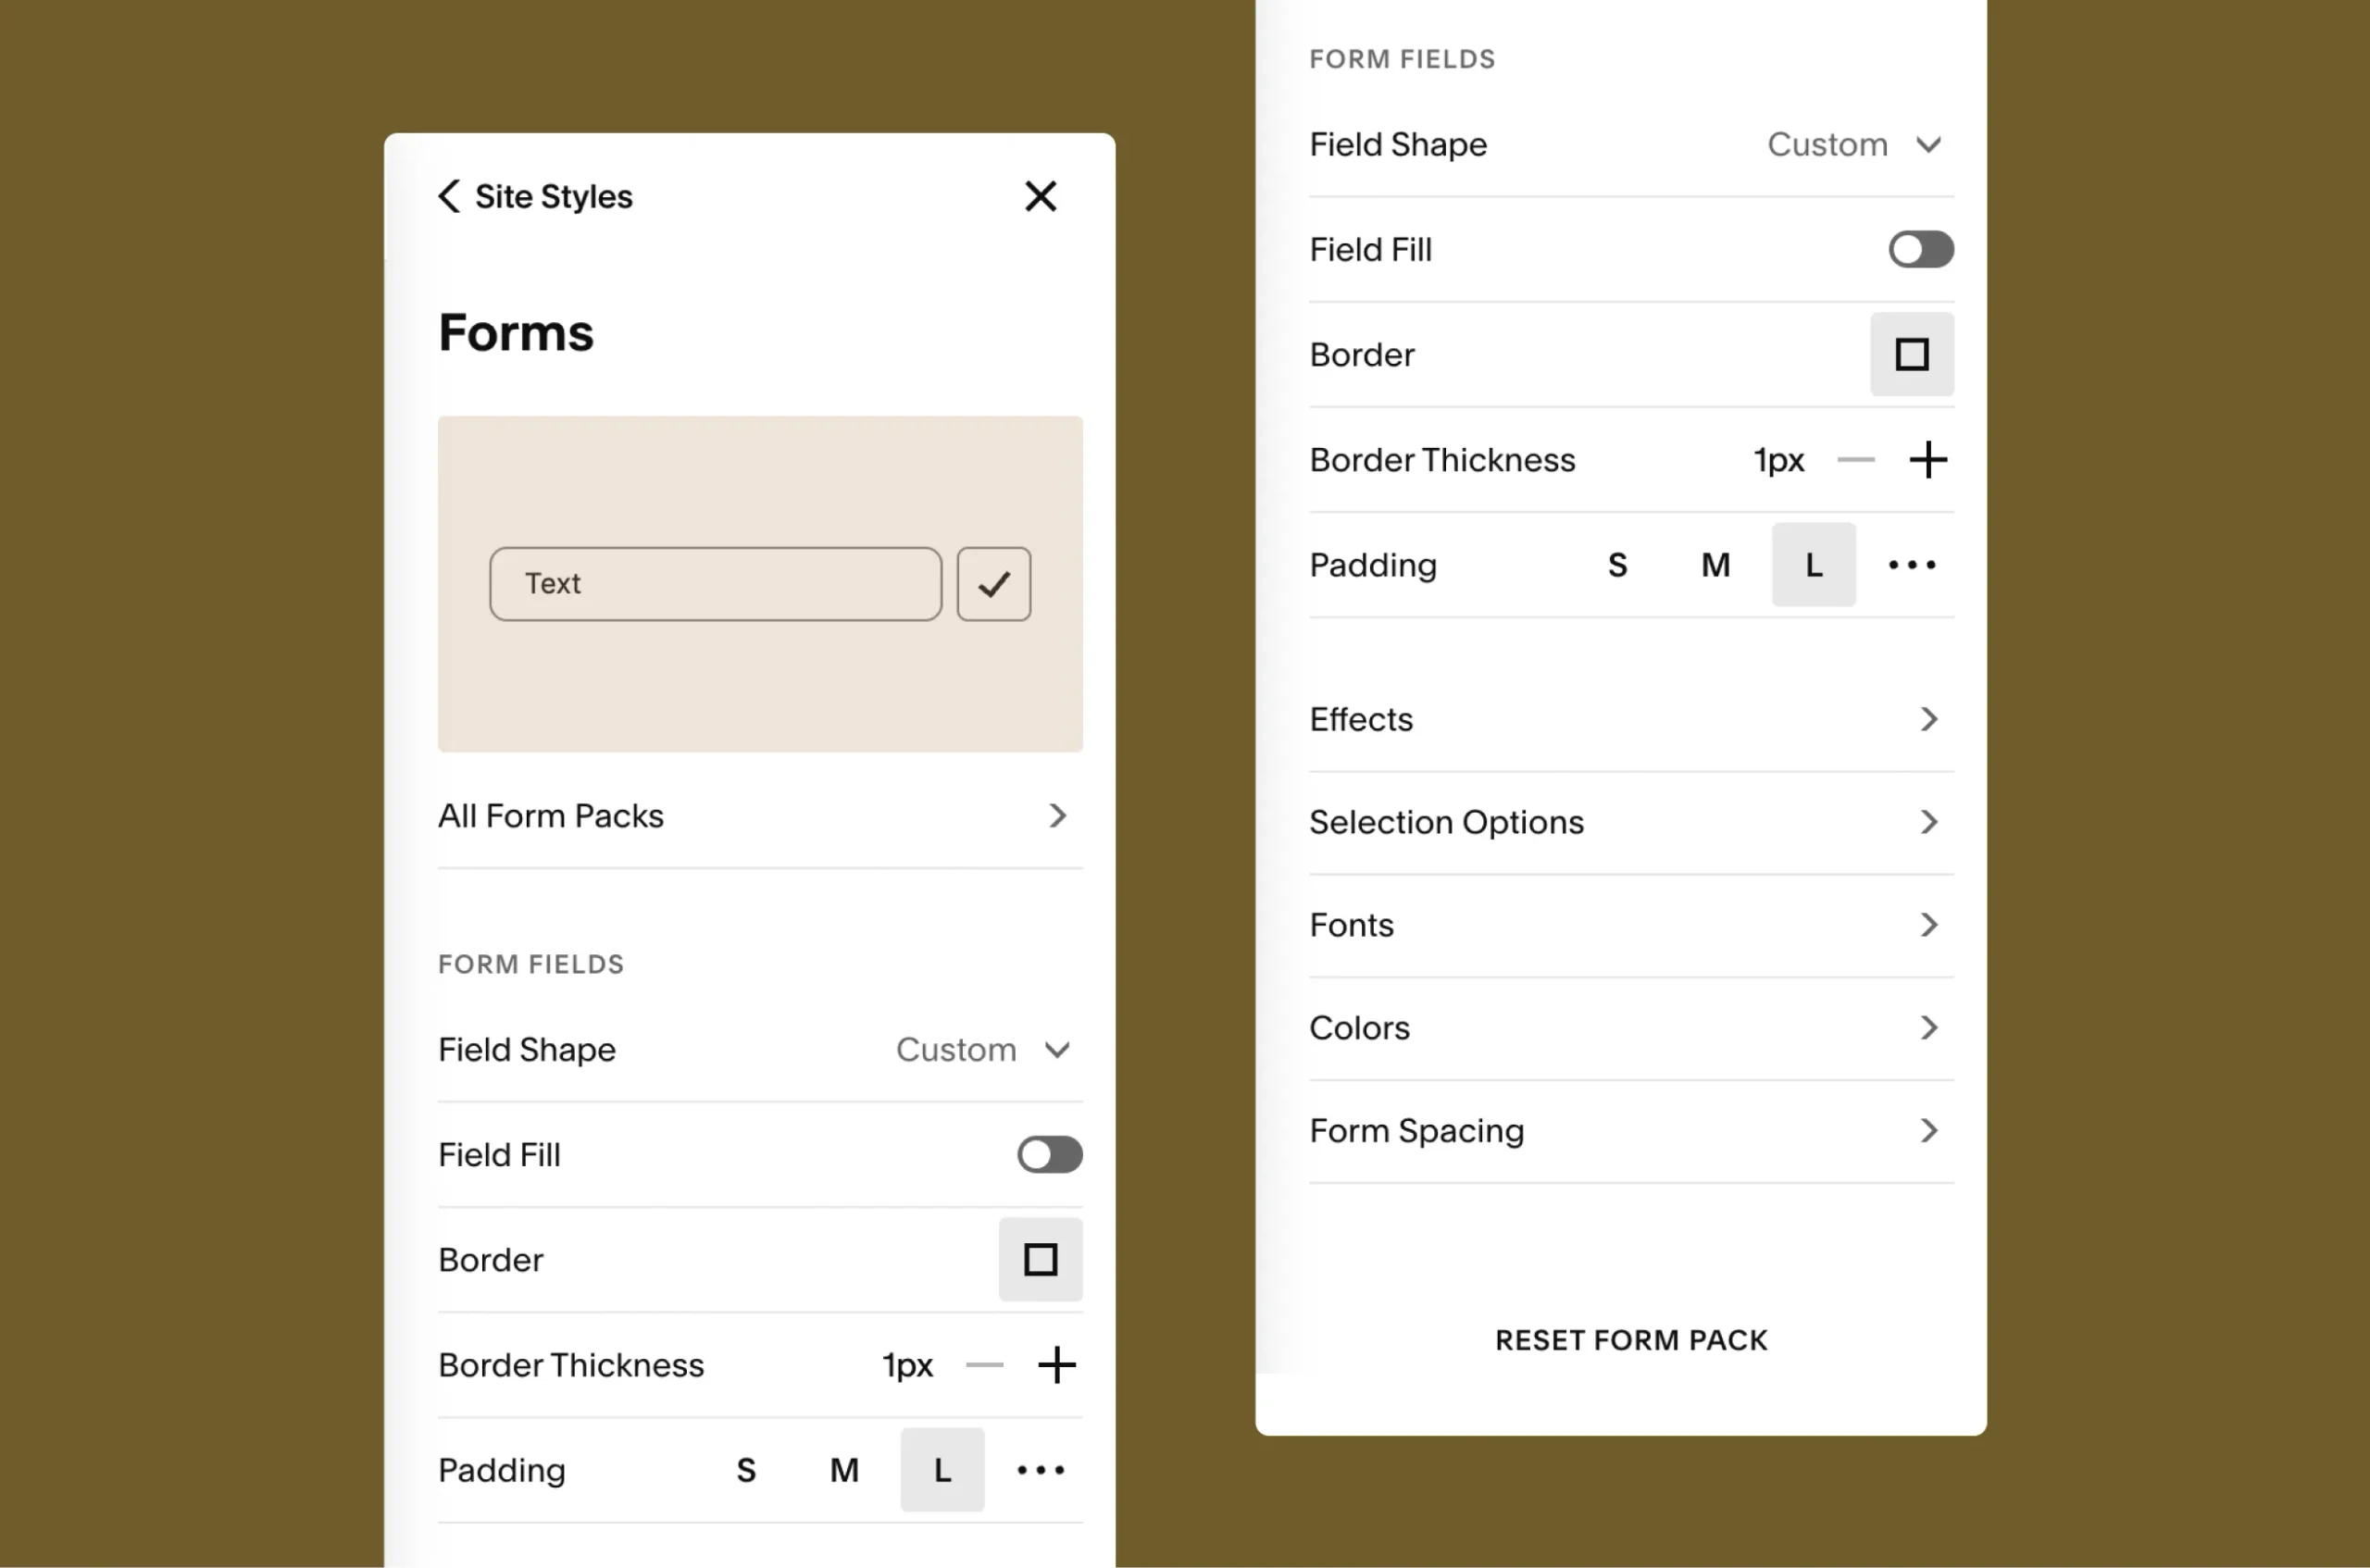
Open the Site Styles and click the forms. Adjust the field shape, border, padding, and more so the form matches the rest of your page. Keep enough space between fields that a visitor can tap them easily on a phone.
If the form still looks out of place, check your site’s button and font styles first. The form picks up most of its look from those.
Step 6: Test it before anyone else sees it
Submit a test entry yourself and check four things:
- The confirmation message appears.
- The email notification arrives. Check your spam folder too.
- The entry shows up in your connected storage, such as the Google Sheet.
- The form is easy to complete on a phone.
Notification emails can occasionally go missing or land in spam, which is why a stored copy and a test matter. If nothing arrives, check the notification address for typos, look in your spam folder, confirm the entry appears in your connected storage, and send another test.
What not to ask in a website form
Do not collect sensitive information through a general website form. That includes government ID numbers, bank or card details and passwords. Use a secure portal or a proper document-sharing tool for those, and tell clients how to send them.
If you collect personal information, link to your privacy policy near the form. Adding people to an email list is a separate question: only do it for people who have agreed to it. Privacy rules vary by region, and a checkbox on its own does not make a form compliant, so check the requirements where you work.
Before you share your form
Know the limits of the built-in form: The Squarespace form block is built for short forms. It does not offer conditional logic, which would show or hide questions based on earlier answers. If you need that, or a longer form, create the form in a tool such as Typeform, Tally or Google Forms and embed it on your page with a code block.
Where to put the form: Put the form on a page people can find in one click. Add it to your main navigation or a clear button on your homepage. Our beginner’s tutorial on setting up your Squarespace navigation menu shows how.
A good client intake form doesn’t need to be complicated. Start with the questions you need to prepare for a first conversation, make sure every submission reaches the right place, and test the form on desktop and mobile before you share it. You can always add more fields or connect more tools as your process grows.

Want it built for you?
If you would rather have a website with the form, the pages and the design handled for you, see what is included in a custom branding and web design project.